Crafts for Kids: Perler Beads
A fun yet time consuming craft for kids
Disclosure: this post may contain affiliate links. I may get a small commission at no additional cost to you if you decide to make a purchase through one of my links. You can read my full disclosure here.
If you ever went to summer camp, chances are you ended up at a table making crafts with your friends at least once. Maybe you made a friendship bracelet out of string or a fun animal keychain out of plastic string and neon-coloured beads. There are so many crafts to do with kids and Perler beads are another classic art project.
Using shaped pegboards and fusible plastic beads, kids can create anything from a heart or letter to an animal or food. It’s a time-intensive craft but kids are able to use their creativity and math skills to create different shapes and patterns. Children aged six and older can do it and you only need a few supplies. Here’s how we created two Perler bead crafts.
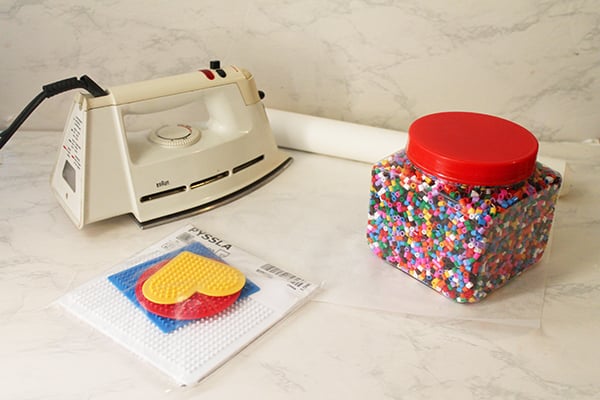
Things you’ll need
Instructions
Find your pattern
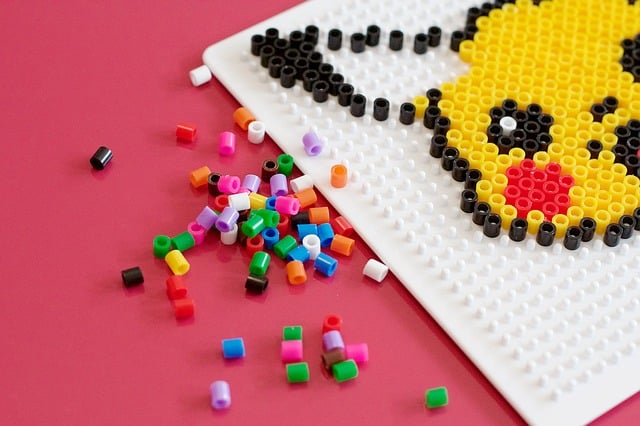
The best way to start is to decide what you want to create. If you want to create something without a pattern, then you can use whatever pegboard and Perler beads you’d like. But, if you want to create a specific shape or object, you should search for the pattern online. We did a simple search on Google and found an easy to follow pattern for the minions. You can also search on Pinterest or Perler.com.
Pick your Perler beads
We bought a huge container of Perler beads and a set of pegboards from IKEA. It was less than $20. For a larger selection of coloured beads, visit a craft store like Michaels or online from Amazon. Once you’ve picked your pattern, you can start sorting the beads into piles by colour. We recommend using small bowls to help organize the beads and keep them from rolling away.
Get crafty
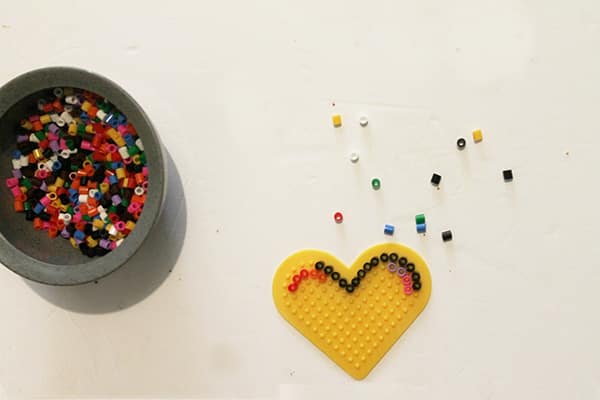
Once you have your colours sorted, you can start placing the beads on the pegboard. Follow the pattern carefully, counting how many beads are needed in each row. Once your finished placing all the beads, you can warm up the iron and cut a small sheet of parchment paper.
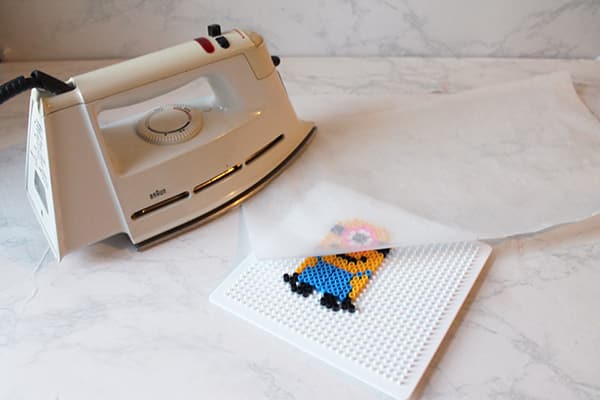
Apply heat to your Perler beads
When the iron is warm, drape a small sheet of parchment paper over the pegboard. Place the iron on top for 30 seconds, using small circular motions to avoid burning. After 30 seconds, flip your project over and remove the pegboard from the back. Fold the parchment paper over and apply heat the new side for 30 seconds.
Show it off
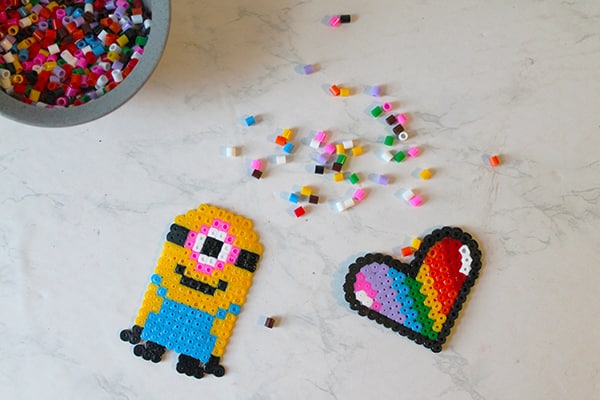
After the 30 seconds on each side, your beads should have melted together. Remove parchment paper and let your creation cool for a few minutes. Once it’s cool, you can decide how you want to use or display your craft. If you want to hang it, use a paper clip to poke through a bead and then thread a piece of string through. That’s it!
What craft did you decide to make? Tell us on our Facebook page and show us a picture.